|
Continuing the tutorial series from my previous post, I finalized the donut, and created and finished a cup of coffee, or tea, as I have yet to decide which it looks more similar to. The finished donut has sprinkles, which were scattered on top of the icing using a particle system, and we could control the color palette of the sprinkles by applying a color ramp node to the material. Texture painting was straight-forward, as you are simply painting onto your object, however, this tool can be very slow depending on your GPU/CPU (whichever Blender is relying on, hopefully your GPU) so take that as a warning. Giving the donut real texture through procedural displacement was the most difficult concept for me to grasp in the series so far, as the look of a bumpy texture was achieved through a complex web of nodes. Working further with Blender, nodes are going to be some of the most difficult tools for me to learn and understand, however they are an extremely important aspect of modelling in Blender, so I will continue to look more into how they work and explore the many different nodes the software has to offer. Once the bumpy texture was achieved, our donut was finished, and looked more realistic than ever. The modelling of the cup and saucer was quite simple, and I was introduced to the spin tool when making the handle for the cup which was again quite simple and straightforward. In order to give the cup and saucer the glass texture I simply applied a material to the cup, applying the same material to the saucer, and turned the transmission up to 1 and the roughness to 0. Next we move on to the coffee/tea. An important tip that seemed very strange was that the object that is the liquid should go slightly inside the glass because if its separate the light bouncing between the glass and liquid makes the liquid appear, well, wrong. To make the liquid appear to have the color and consistency of a dark coffee/tea we would work with volume absorption. Messing with color and density would eventually give us the desired effect, and higher density = darker liquid. To get the condensation you see on the glass below we worked with UV mapping on our cup. Using the plugin mentioned in the tutorial made the process of UV editing much easier however I did learn much more about the process of UV unwrapping and where to apply seams. The finished cup of coffee/tea is below and my final result from the tutorial will be up on my portfolio soon! 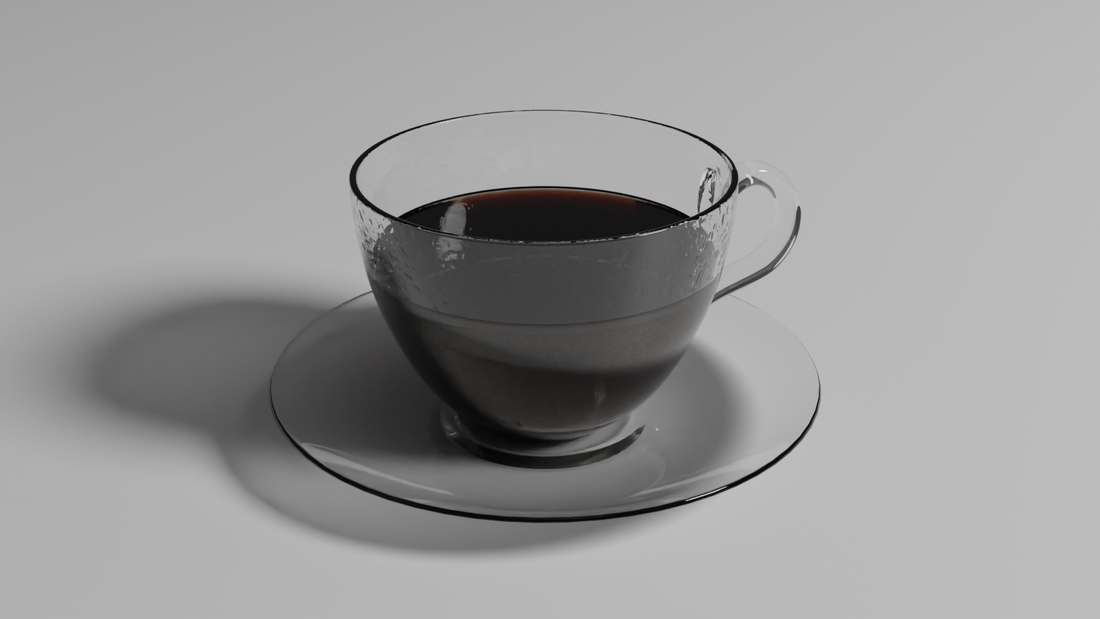 In Summary:
0 Comments
|
About meI am a Senior at DSA and currently taking the Advanced Game Art and Design course. I enjoy playing video games and drawing in my free time. The opinions expressed within this blog are my own, and do not reflect that of Durham School of the Arts of Durham Public Schools Archives
May 2022
Categories
All
|
 RSS Feed
