|
When I was brainstorming how I wanted to make my outpost my main idea was to have cold-looking, drab architecture that could survive harsh weather conditions. I took a lot of inspiration from looking at actual arctic research stations, a lot of which were in bright colors like red, which I ended up avoiding in my final model. Another difficult decision was the windows, because I was trying to determine whether having all the windows be plain small squares or slot-like like the one on the window, or to have them as they are in the final model below. Ultimately I went with the design below because the simple geometry of the previous design just made me feel like the model was too simple, although I'm still not sure if this was the best choice as the shape of the windows is quite homey in comparison to the rest of the design making them look out of place. One of the aspects that I did have envisioned from the start though was the door, which came out pretty much exactly as I wanted; a heavy-duty steel door with a small, unwelcoming window and a number/lock pad. All in all, this process was a bit tedious due to the modular components since I still need to work on my organization when it comes to modelling, but it could've turned out worse.
0 Comments
For this assignment we had to create a modular house, and while it was quite simple I found myself struggling to keep everything as neat and in order as I would like. Modular design works best when everything can fit together and fall into place like puzzle pieces, but for me my modeling technique was unfortunately a bit sloppy so that was difficult for me to accomplish. This was one of the first activities back in 3DS Max though, and while it wasn't the easiest I was able to remember the keyboard shortcuts fairly quickly and they came back pretty naturally. 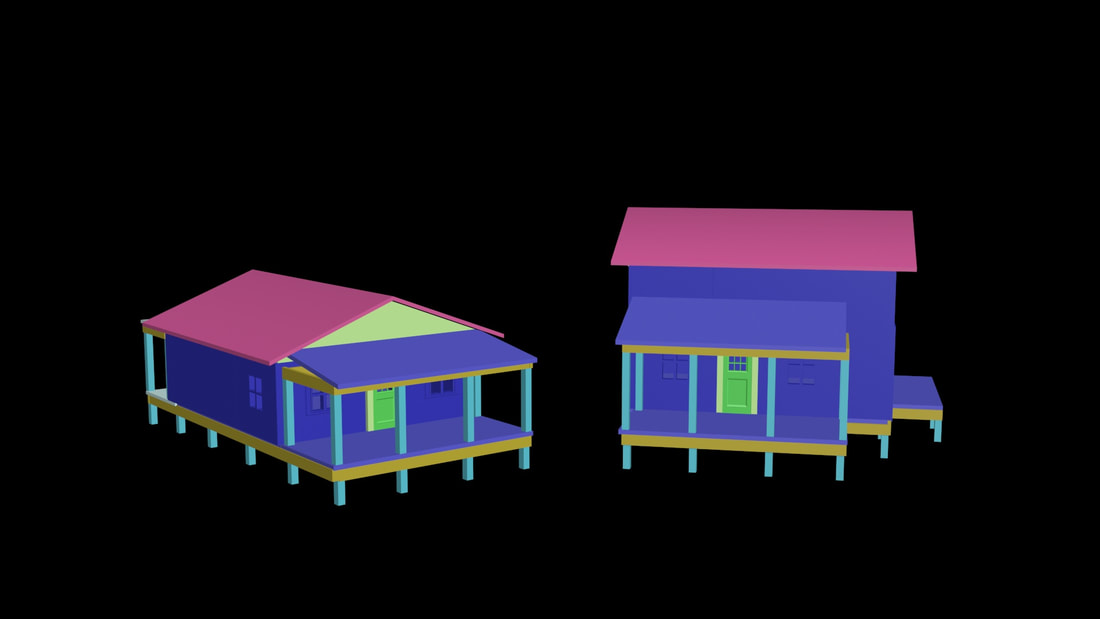 Using snap to vector for translation was new and pretty helpful when it came to getting the positioning of certain components, so that helped getting things aligned to a degree. Although I had this tool though I still ended u[ struggling getting alignment perfect, which is something I'm going to need to work on as I continue to brush up on 3D modeling.
Continuing the tutorial series from my previous post, I finalized the donut, and created and finished a cup of coffee, or tea, as I have yet to decide which it looks more similar to. The finished donut has sprinkles, which were scattered on top of the icing using a particle system, and we could control the color palette of the sprinkles by applying a color ramp node to the material. Texture painting was straight-forward, as you are simply painting onto your object, however, this tool can be very slow depending on your GPU/CPU (whichever Blender is relying on, hopefully your GPU) so take that as a warning. Giving the donut real texture through procedural displacement was the most difficult concept for me to grasp in the series so far, as the look of a bumpy texture was achieved through a complex web of nodes. Working further with Blender, nodes are going to be some of the most difficult tools for me to learn and understand, however they are an extremely important aspect of modelling in Blender, so I will continue to look more into how they work and explore the many different nodes the software has to offer. Once the bumpy texture was achieved, our donut was finished, and looked more realistic than ever. The modelling of the cup and saucer was quite simple, and I was introduced to the spin tool when making the handle for the cup which was again quite simple and straightforward. In order to give the cup and saucer the glass texture I simply applied a material to the cup, applying the same material to the saucer, and turned the transmission up to 1 and the roughness to 0. Next we move on to the coffee/tea. An important tip that seemed very strange was that the object that is the liquid should go slightly inside the glass because if its separate the light bouncing between the glass and liquid makes the liquid appear, well, wrong. To make the liquid appear to have the color and consistency of a dark coffee/tea we would work with volume absorption. Messing with color and density would eventually give us the desired effect, and higher density = darker liquid. To get the condensation you see on the glass below we worked with UV mapping on our cup. Using the plugin mentioned in the tutorial made the process of UV editing much easier however I did learn much more about the process of UV unwrapping and where to apply seams. The finished cup of coffee/tea is below and my final result from the tutorial will be up on my portfolio soon! 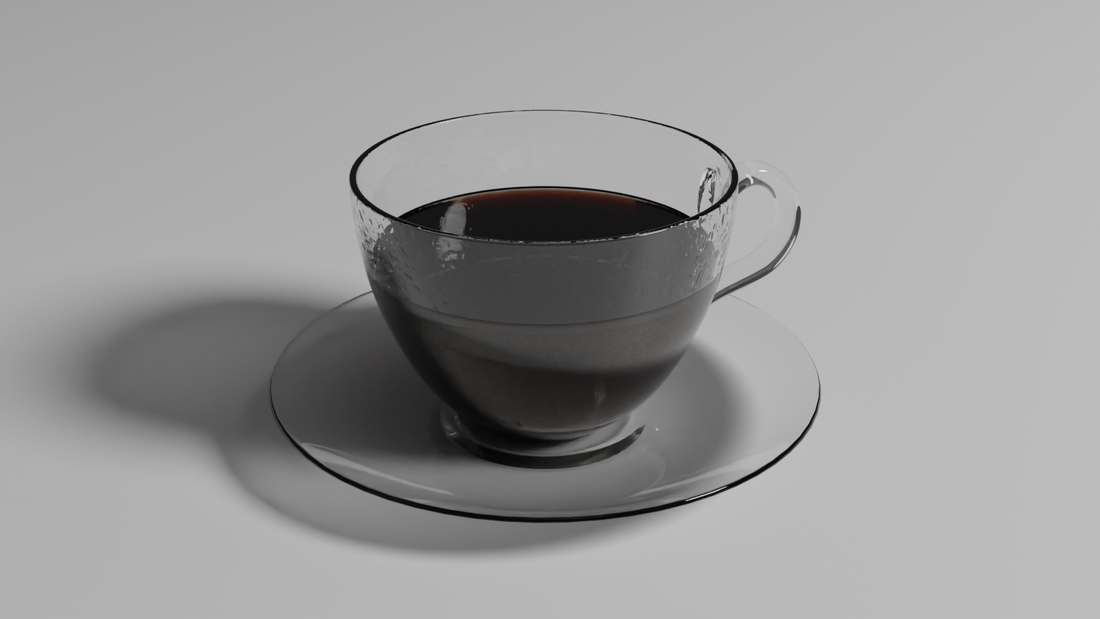 In Summary:
After going in-depth to camera settings and how they all work together to create a thought out picture, I feel I will be able to better understand how to incorporate this into 3D modeling. 3D simulated cameras include aperture, ISO, and shutter speed just as a camera irl. However, being able to test out these aspects in real time with a camera can be very useful in one's understanding of the concepts. Something interesting about these settings is how they all affect exposure, and can be used strategically to provide an image with the wanted exposure. Integrating these concepts with lighting which we previously covered, we can create more atmospheric, finished, and possibly realistic scenes. Going even further in-depth is Bokeh and FoV which are used to blur backgrounds (this is an oversimplification of Bokeh) and field of view can shift the focus, change the impact of certain objects, and change the tone. Utilizing these, we can create complex scenes, and when used correctly, more impactful scenes. 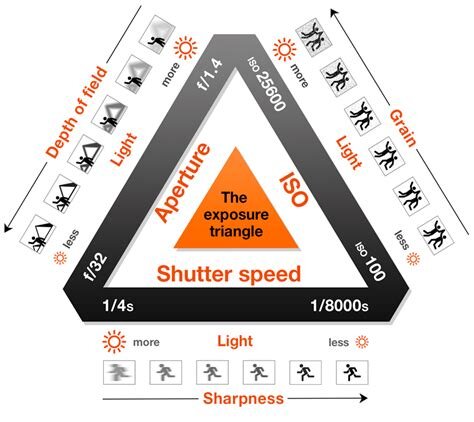 This unit has been all about lighting, which I'm pretty happy about. Lighting is so important in every scene in every game, movie, pretty much any entertainment media, so recreating that into 3d scenes is kinda exciting. So far, we've learned about sun positioners, standard lights, and Arnold lights. My personal favorite has been the Arnold lights because, despite the mildly excruciating render time, the renderer just has more capabilities than the scanline renderers, so the lights look far better and more realistic. My least favorite would have to be sun positioner just because it's the least fun to work with and it feels as though I have less control over it. One thing I've taken away from the past few assignments is how to be able to use multiple different types of light sources in conjunction with one another to create a more well-lit scene. This can be useful because if you want to use standard lighting in your scene, just one of these can look fairly plain and unrealistic, but if you find the right combination of types of standard lights, you can create that complex lighting and elevate your scene further.
In this unit we learned new, and really interesting topics/techniques for our modeling and animating. This includes MassFX, particle systems, daylight systems, and the cloth modifier. These new tools are extremely useful and I hope to find myself using them a lot more in the future to create more advanced-looking models and animations. Unfortunately though, this comes at price, and that is the difficulty lower-end computers have with these tools. Recently I was able to get 3DS Max on my computer and it handles things semi-smoothly, but the issue comes in when we combine these tools into a single file and attempt to render it. This is really sad to see after we spent the unit learning about these topics, because when put together you can make beautiful, intricate, or complex animations, but if your computer can hardly function during the process the fun is taken out of modeling and you're just left feeling frustrated. After learning my lesson and trying to put too much pressure on my computer, I realize I will have to make sacrifices, even if it is unsatisfying to do so. A world in which you could model anything you want, however you want without 3DS Max crashing sounds great, but it's simply not possible. It's a shame because particle systems and MassFX are able to create realistic movement, but can become too much for many older, less capable computers, such as my own, to handle.
this unit we have been working with compound objects, making me familiar with a lot of new tools and their functions. A lot of these have been useful, however, some I don't see myself using often. In my last post I discussed the ProBoolean and Boolean tools, and since that post I have actually found myself using it more often than I had originally thought I would. It is useful when you want to quickly create a new shape, and it can create many new shapes just by using two. Subtraction has been the most helpful and is what I typically use Boolean for. Next we learned about Blobmesh which had some perks, but most of the time looked a bit off to say the least. It's difficult to make this tool look good and you have less control over the final product than I would prefer. There are other roundabout ways to get the kind of liquidy effect this tool claims to make that use a much less frustrating process. The loft tool has been really easy and efficient to work with. I can see it being useful in many situations as you simply need a shape and a path to make a new object. Interesting designs can be made with this tool and other modifiers on top of it, so I expect to continue using it. Procutter is definitely useful, especially for making signs, due to being able to imprint or attach the shapes you want. These are some of the compound object tools we learned about this unit, most of which I will continue to use in the future.
In summary:
For this past careers assignment I learned about different careers available in the game industry: 2D artist, 2D animator, 3D environmentalist, etc.. I discovered the importance and formatting of your resume and cover letter, and to make sure to look into the company you are applying to before creating either documents. Finally, the importance of your portfolio. Your portfolio is useful to reflect the necessary skills for the job you are applying to, to show that you meet their requirements, but you should also go beyond that and show your skills to their full extent. What jobs in the game industry are looking for is peopled talented at what they do, and who can show their talent and dedication through their work, and the way to show that is by putting forward your best work on your portfolio. My own portfolio right now is primarily 2D, and needs some tweaking since I may want a job as a 3D artist, so in order to be considered for that kind of position it's imperative I show I have the skills required. I should make sure to keep tings relevant for when I apply to a job, and for the career of a 3D environmental artist, it wouldn't make much sense to have a mainly 2D portfolio. This is an area I will be working on this year, and throughout the year I will create more and more 3D pieces, the best of which I can add to my portfolio. As far as formatting, I am content with mine, because it's simple and easy to navigate with thumbnails and a slideshow, but the content itself needs more variety ass far as 3D work.
In Summary:
References:
Since we just finished our 3D unit I thought I would pay tribute to one of the best looking 3D animated shows out there: Land of the Lustrous. The story is closest to a coming-of-age story where the main character develops physically, emotionally, and mentally throughout the story, but what I really want to talk about is the beautiful animation. The creators really maximized the pros of 3D animation and 2D animation and combined them flawlessly. One of the most interesting parts of the character design, though, is the hair. Using unique textures for each model they were able to create movement and texture of hair in a way that couldn't be done through 2D animation. I've seen a few 3D animated shows before, but none hit the mark for what 3D animation could and should be quite like Land of the Lustrous.  References:
This year I've gained experience with software that was completely new to me. I have learned tools and methods in many programs like: Photoshop, Illustrator, Animate (Flash), After Effects, and 3DS Max. My favorite unit so far though has been the most recent. Working with 3D models and not only being able to begin to bring them to life with the basics of textures, but also animation has been exciting for me. Being able to create an animation using a program you knew nothing about at the start of the year feels pretty great. It takes a bit getting used to animating in 3D, but it is definitely easier than 2D animation because the computer does most of the work for you (Just remember to turn on autokey). I've made two animations this past unit and you can find them on my selected works page! It isn't easy to learn so many new tools from many different programs all in one year, but I'm glad I did, and I can't wait to expand that newly found knowledge next year!
|
About meI am a Senior at DSA and currently taking the Advanced Game Art and Design course. I enjoy playing video games and drawing in my free time. The opinions expressed within this blog are my own, and do not reflect that of Durham School of the Arts of Durham Public Schools Archives
May 2022
Categories
All
|


 RSS Feed
