|
When I uploaded my first post on 3D modeling talking about primitives and modifying subobjects we had just begun the very basics of 3D modeling. While I am still only a beginner we have still expanded our knowledge of 3D modeling tools since that first post. Then, even though what we were doing was simple, I was happy with how things were going, and although our work has gotten more complex with different tools, I am still just as happy if not more so. We can now make more interesting models that take more than just simple primitives. Not only have we learned how to make unique shapes using splines and getting more used to modifiers and continuing to learn about the different options, but we also learned how to apply material and texture to our models. This was a big step forward for me, and made 3D modeling more fun. We can now apply different patterns and colors, and different blends of them. One of the more exciting aspects though is the fact that we now can add images onto our models. Using the new information on materials we could use our past models to create an entire scene. 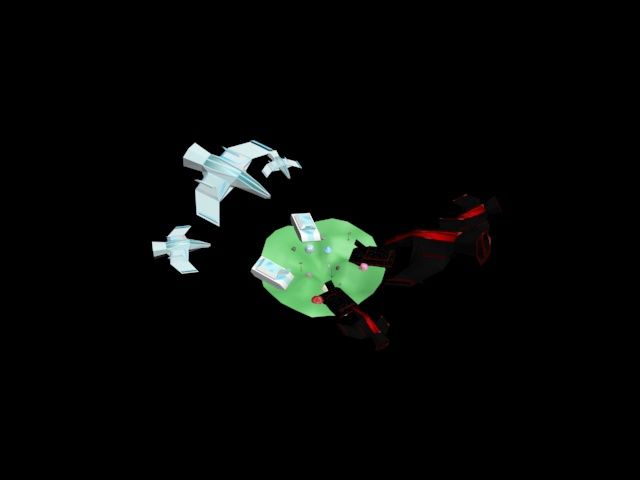 This last project really shows the progression from when we first started modeling because all we could do was create simple shapes and add one color. Now we can create interesting and unique shapes and unique blends of materials enough so to create a whole scene. I'm really excited for learning how to animate our models in the near future because so far, I have enjoyed this unit and 3D modeling itself.
In Summary:
1 Comment
In this past unit, we have started working with 3d modeling using primitives and modifying subobjects. Before we could start getting into the very basics of 3d modeling though, we had to understand and get used to the 3ds Max interface. This was more time consuming than the projects we have done so far, but it has made the work we've been doing much quicker and more efficient. Creating the models by using primitives, and using subobjects to change and modify the models so far has been quite easy. While we haven't yet delved into working with more advanced tools yet, already using basic objects like boxes and spheres we have been able to make simple tanks, pencils, snowmen, and more. Here is a top view of a tank I created using primitives, the move tool (W), and the rotate tool (E), and modified with the extrusion tool: 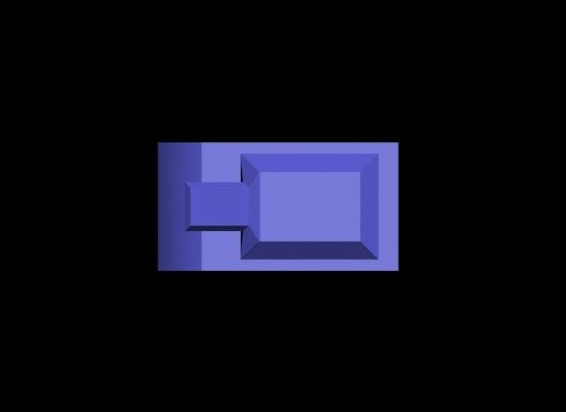 This simple model allowed me to get a feel for the extrusion tool which we have continued to use in our other models. Although simple, learning the fundamentals of subobjects and working with tools like extrusion and bevel is important for future projects that may involve creating complex models. For the future I am excited to learn how to create more detailed models, how to create and apply textures, and how to rig models and animate with them. There are definitely plenty more tools for me to learn about in 3ds Max for me to accomplish these goals, and with the large interface it may take some time, but so far the tools have been easy to use and catch on to.
In Summary:
References;
We've worked with a few motion-based programs so far, but most recently we added Premiere Pro to the list. So, compared to the programs we've worked with, Animate and After Effects, how do we compare Premiere? Well, we can start by pointing out some similarities between these programs. These programs all do not require frame-by-frame artwork, although you could use this technique which would be more suited for Premiere and After Effects. There seems to be some big differences for Premiere, though. Animate and After Effects I look at as animation software, with Animate utilizing tweens and keyframes, and After Effects focusing on motion graphics. premiere, though, seems more useful as video editing software because it would be the best option for putting together several images or video clips and editing them together in the desired order. In this sense After Effects seems to be more similar to Premiere than Animate due to more efficiency when putting together images to make video. Efficiency is another comparison we can make between these programs. Animate seemed to be the least efficient to work with just due to the difficulty of working with tweens, but since tweens would be generated for you it also takes away the need for every other frame to be made by you. All in all though, Animate took the longest for me to work with, and was probably the most frustrating. Next is After Effects, and it was honestly kind of fun working with motion graphics, and for motion graphics the program was great, but I feel that putting together images when creating frame-by-frame animation would have been less tedious and more suitable for Premiere. Premiere has by far been the easiest program to work with, and is the best for video editing out of these three.
In Summary:
What do you think one of the most important parts of creating a video game is? If you guessed (or knew) world building you were correct. What can really make or break a game is whether or not it can make us feel like we are there, and that these characters could exist. One aspect of this is shown through idle animations. Sometimes we don't pay attention to them, but if you've payed video games before you have probably noticed a few. A character can appear more real if they try to spend their time idling by maybe tapping their foot, or jumping rope, and acting nonchalant, rather than doing nothing. This may be a more subtle form of world-building, but a good way to make a character real and appealing.  Take this idle animation from Super Mario 64. It gives Mario a bit more character and personality, and since he is falling asleep waiting for the player, it makes him seem real. This isn't necessarily my favorite idle animation, as they have grown, gotten better and more complex over time, it's still quite impressive for 1996. It does the job of creating a fun atmosphere, and adding a yawn at the beginning makes Mario appear even more like he could be real. Instead of leaving characters to stand there and do nothing but stare into the abyss, isn't exactly good for your world building, even a subtle few blinks and sways can make all the difference between the shell of a character and one full of life.
In Summary:
References:
2D animation has a pretty straight forward title, so you probably already know the premise of this post by looking at the title. This type of animation is quite relevant to me and the other students in my course because we will soon be learning how to take what we have have been learning recently in Illustrator into our own animation. I am really interested in this aspect of media and design and have been waiting for this lesson because it literally puts the information we know into motion. It will be interesting to really break down how 2D animators create so much movement in their work just using 2D imagery. unlike what we've been doing so far, in order to successfully create animation we will need to have an eye for the process of movement and not just one still image. As you most likely can guess animation takes time because you need to create many images to make even one smooth motion, so we will definitely need to take advantage of as much of our in class work time as we can. 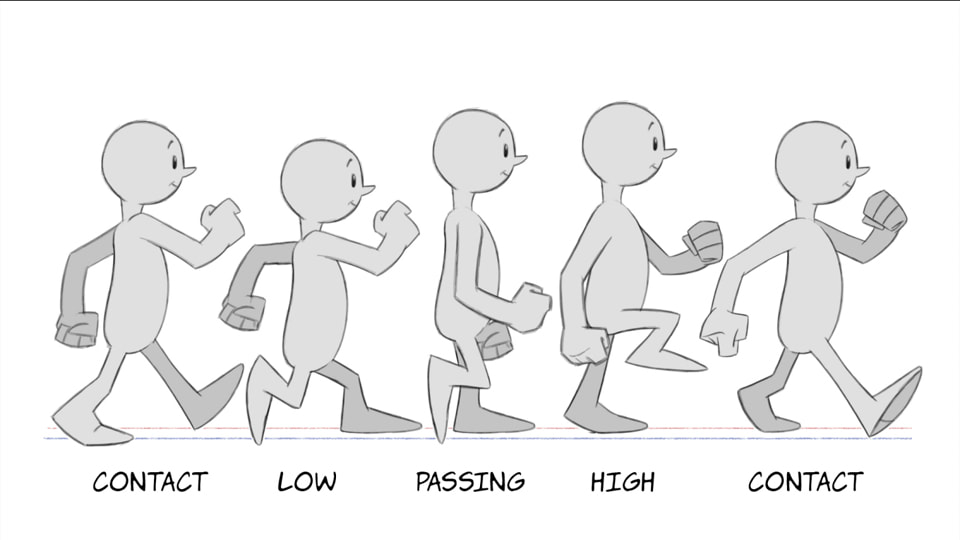 When we think about the creativity aspect, this will not only be how you can create an interesting storyline,but also being able to make an animation that isn't too short for the story so it feels rushed, but not too long so the people watching lose interest. Since we will most likely not have the time to make long animations we will have to focus on what storyline can be interesting, but also not take too long to tell. Animators have to deal with this type of decision making all the time. Sometimes we can overlook the design aspect of animation in which we have to recognize what will make our animation more or less appealing. These are all things 2D animators take into account, and of what I'm sure we will be learning about soon.
In Summary:
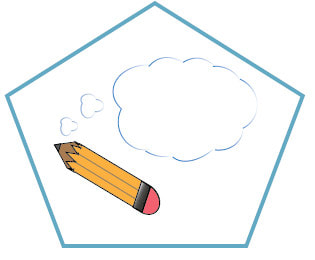
As we continue our work in Illustrator, we are using more hands-on tools like the pen tool, and the mesh tool. just beginning work with these tools can be quite challenging in some aspects. The most difficult part for me to get the hang of in the mesh tool would be placing the handles where I want them to go. This will determine the highlights and shadows of my objects to make them more realistic, but will take a while to get used to. Figuring out where to place new anchors and using handles make this tool more advanced than what we first learned in Illustrator, but being able to master this skill would be a great asset in the long run for more appealing images. 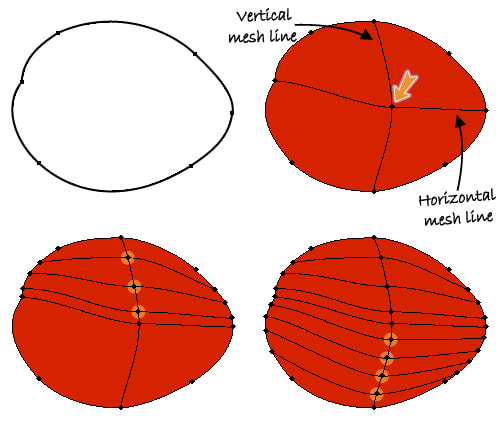 Using the pen tool comes easier to me than using the pen tool. I also enjoy it more because it's interesting figuring out how to make the objects you want. It definitely takes practice to get it just right, but I so far I've been picking up on it.You can play this game at https://bezier.method.ac/, it gives you practice on making different shapes with the pen tool. You can make curves by holding down the point you are on, and you can make straight lines by holding the shift key. Using the alt key changes your direction, which is a useful tool for more complex shapes. The image below is one of my digital badges which I created mainly from basic shapes using the shape tool. The pen tool would have been more efficient in this case because I could make objects like the pencil and clouds in just one go. In the professional world one might be able to use these tools to create storyboards or concept art for games or animations.
In Summary:
Through the year so far, we have already gone over some tools and techniques used in Photoshop. Of what we've gone over I most enjoy using layer masks, and when it comes to adding color to an image, blend modes are a quick and easy way to keep the colors realistic. When you add color directly onto an image, it loses the texture and realistic appearance it once had because while you add color you hide everything else. Blend modes can remedy this problem because when you add color to part of an image you can add a blend mode and this will allow the original image to show through while keeping the color you wanted. In the image below I used layer masks and blend modes to colorize an image:  Layer masks are good for hiding unwanted parts of an image, but since they are nondestructive you can always bring it back. You can use layer masks to put in different subjects and/or backgrounds into an image. If you're like me then you will probably like the ability to clean up the process with the paintbrush tool. When you go into quickmask you can work with black and white to add or subtract from what is being hidden. In the image above I used quickmask to try and clean up any lines I could. To get different colors in the image, I had to select the parts of the image i wanted to be a certain color, and created a new layer from them. By doing this I would still have the original image while working on the new layer.
In summary:
While you might not notice as you enjoy playing a video game, the elements and principles of design are always present within them, whether that mean the design follows a certain structure, or purposefully denying them. When the creator of a game can fully understand these concepts, they can manipulate them whichever way they please. 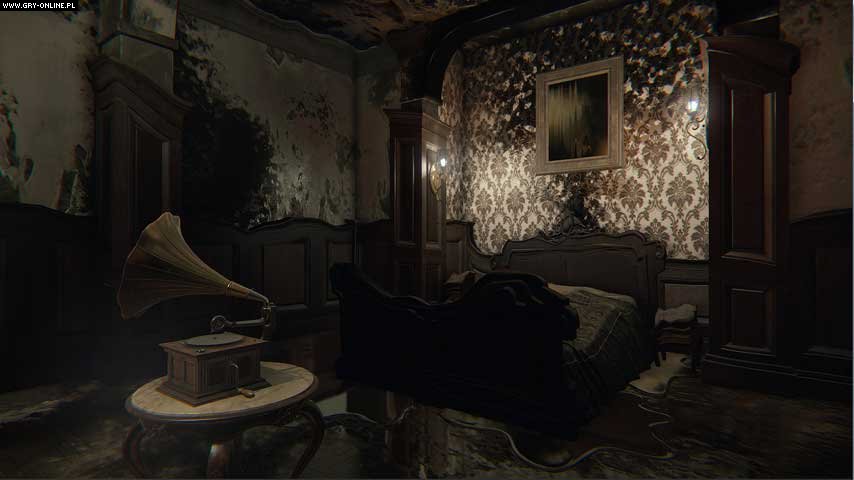 Since we are still in spooky season, and with the second game's trailer reveal being released, I decided to look over this screenshot taken from the game "Layers of Fear". The colors in the room are mostly very dark and dull, and the palette gives the room a sense dread. You can see in this image that the room takes the appearance of melting, and the walls are being covered in a darker shade. The alignment of the background pillars and all the shapes being used here could make the player quite uneasy, especially in the spur of the moment. How everything around it except for the record player is decaying places emphasis on the object.  The next game you will probably remember hearing about, if you hadn't already played it yourself, is "Cuphead". With its challenging and fun gameplay and great game design, there's a reason it was so popular. I'm going to focus on the design of the game, though. In the screenshot taken from the game above, you can already get a feel for what the level is all about. The color palette indicates water, and marine life, and the black outlines around the characters gives them emphasis and separates them from the background while giving them a more cartoon-ish look. Using two primary colors for the main characters makes sure that they are not included in the themes of each level, individualizing them. Using different art styles in the forefront and background was also a good way to keep a simplistic yet involved design.
In Summary:
Sources:
If you've ever seen or played the Portal games, you've probably recognized the immersive environment it takes place in. A big part of the Portal games is the color palettes used. As you can see from the screenshots taken of the games below, the color scheme is very cool-toned and simple, with a grey-blue toned background. The background is a very light shade of a grey-blue hue which gives the environment a futuristic, and minimalist feel. The accents of color used also go with the cool color scheme, with cool-toned reds and blues. Very light oranges and yellows hues are also used, but aren't used as often so not to take away from the overall environment.  Different colors will convey different feelings, and this is used in the Portal games. As mentioned above the environment of the games seems very futuristic with metallic greys, blues, and many cool colors. The portals themselves use different hues to show different meanings. In the screenshot below color is used in a way to show items of importance. The vibrant blue and cool red stand out from the dull grey background, showing the player what to pay attention to. The red is used to indicate a button, and the light blue acts as a guide. The color palette used in the Portal games is very simplistic, with varying cool-tones with dull, grey hues for the background and pops of color for items of importance. This gives the game an overall futuristic, slightly eerie feel to it, and the choice of color palette helps immerse a player into the game itself. 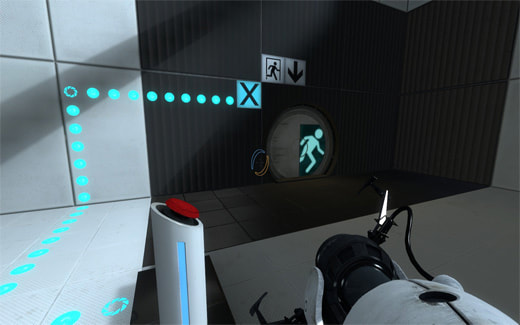 In Summary:
The world is changing everyday, and so is the technology. We have been able to create software that can bend our views of reality with the click of a few buttons. So, how do we use it? Well, naturally the human race will want to "enhance" or
change their appearance; we do it all the time. But when we pretend that these changes are not changes at all is when it becomes dangerous. Almost every picture you see is most likely altered in some way by Photoshop, most of the time you wouldn't even be able to notice. This is what changes our perception of beauty: how it is shown by mass media. You go onto social media, and almost every picture of a person will have been edited by Photoshop, or other photo editing software, but since it looks natural you might just think the photo is untouched. This could make you see flawless people and begin to think this is how most people look, or how they "should" look. When this sort of thing happens you won't even notice your perception of beauty change, but gradually you get more hard on yourself. When you look in the mirror you might be looking for that model you saw online the other day, but that isn't real. You were given this image that was claiming to be real, though, and once you believe it, your perception of beauty has changed to one that is unachievable at the moment. But what is a method to look as close to the models in the touched up photos? The answer is plastic surgery. I think plastic surgery would normally be fine as long as what you are doing is safe. Like I said above it is natural that humans are interested in altering their appearance. But the problem comes when you want a quick, affordable, easy way of changing your face or body. Illegal underground methods are being used more and more often it seems, and we see time and time again the affects it can have on a person. Even when going to someone you think you can trust with plastic surgery it's still risky. Photoshop can influence people to a point where they will take risks to change their appearance to reach an unnatural beauty standard. If you are thinking about getting plastic surgery, make sure it is on your own accord and not influenced by the pictures you see online, because if it isn't something you truly want for yourself it isn't worth the risk. And if you do get plastic surgery or alter your appearance online using photo editing software, please be open and honest about it for the people who might be negatively impacted by the dishonesty. In Summary:
|
About meI am a Senior at DSA and currently taking the Advanced Game Art and Design course. I enjoy playing video games and drawing in my free time. The opinions expressed within this blog are my own, and do not reflect that of Durham School of the Arts of Durham Public Schools Archives
May 2022
Categories
All
|

 RSS Feed
